
Ball Screen Offense—Attacking Drop Coverage
What is Drop Coverage?
If you watched the 2022 NBA playoffs, you undoubtedly saw drop coverage widely used to defend against the constant ball screen actions. The reason for this is simple—drop coverage emphasizes forcing two point mid-range shots, while protecting the rim and limiting kick out threes (two of the most efficient shots in the game).
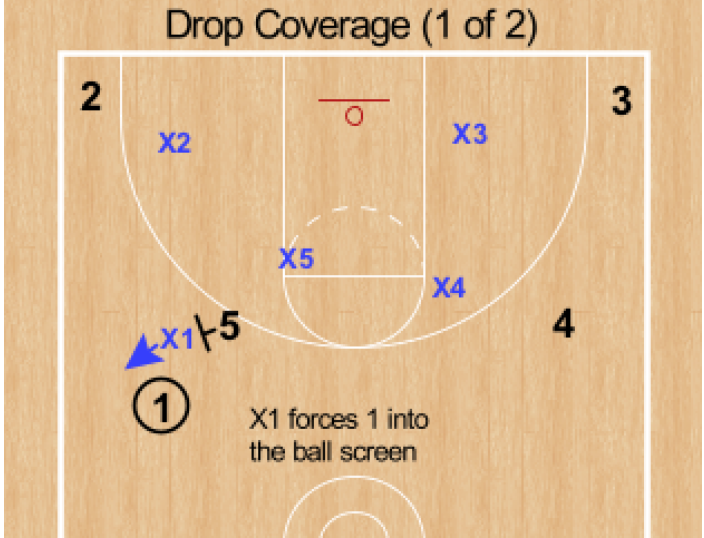
Unlike more aggressive ball screen coverages, in drop coverage the screener’s defender does not follow the screener to the level of the screen. Rather he sits or drops to the predetermined drop level (usually 6-10 feet behind where the screen is set), like the name suggests.
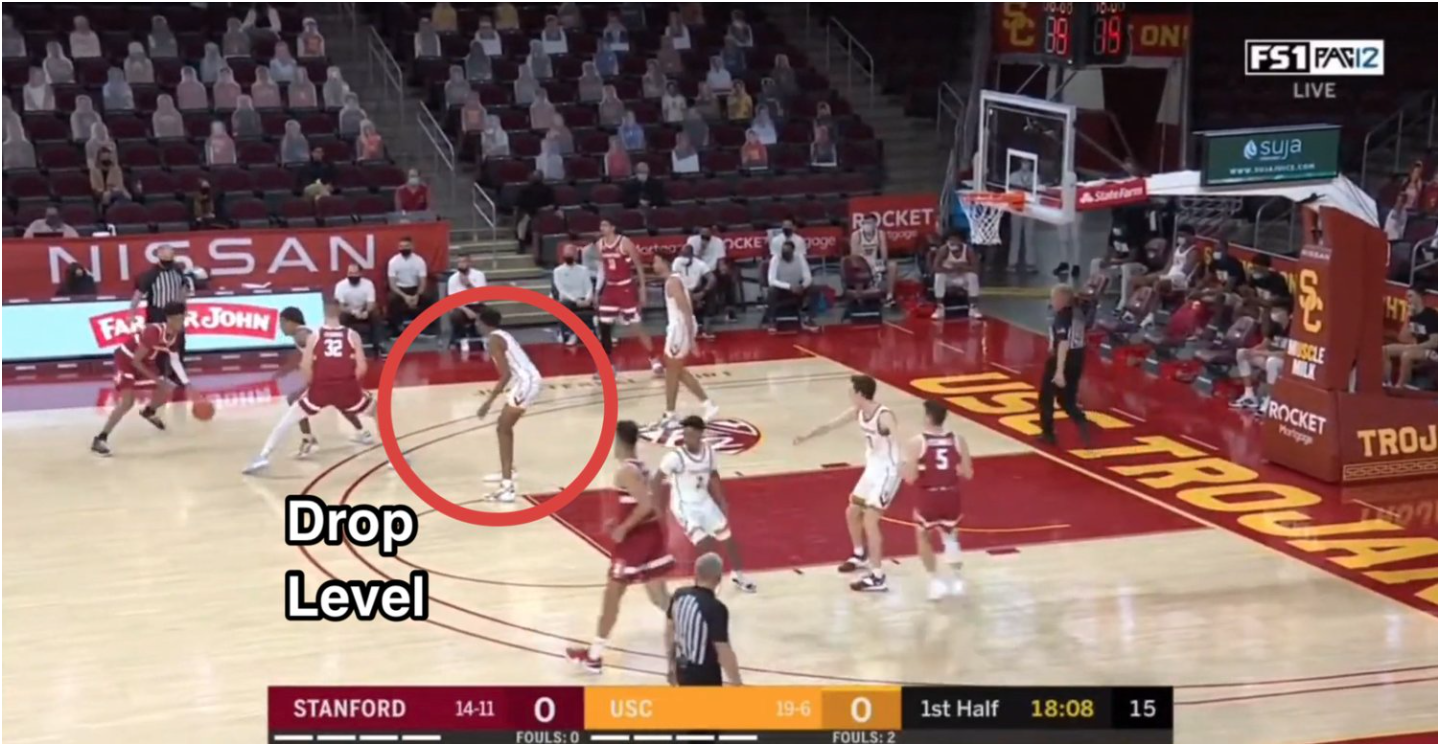
The screener’s defender is positioned at “drop level” 6-10 feet behind the screen.
The on-ball defender then forces the ball handler into the screen and fights over the top while trying to recover and force the ball into the drop defender. The drop defender protects against shots at the rim, while the on-ball defender is responsible for contesting agains the pull up jumper. Drop coverage attempts to contain the ball screen action with only the two defenders involved in the action, rather than relying on an off-ball defender to tag or help on the action.

As mentioned above, Drop coverage is designed to force the offense into taking tough twos. Despite this, there are a number of ways offenses can counter and attack drop coverage to create a high percentage scoring opportunity.
1. Reject
The ball handler’s first option in any ball screen scenario is always to reject the screen if possible, and the same is true when facing drop coverage. As the ball screen action is taking place, the drop defender is positioning himself with the expectation that the ball handler uses the screen. Rejecting the ball screen puts both defenders involved in the coverage out of position and the offense now has an advantage.
If the ball handler is able to reject the ball screen, their first option is to get downhill and finish at the rim. With the big now out of position, the closest help defender will most likely be the corner defender. If he helps off the corner shooter, it’s an easy read and kick out for an open shot.
2. Pull Up
If the ball handler cannot reject the screen and is forced to use it, his question to himself becomes ‘Am I a shooter?’ If yes, his first look as he comes off the screen is to find space for a pull up jumper.
If the defense is in drop coverage against a ball screen, the ball handler should attack the screener’s inside shoulder before using the screen. With the on-ball defender fighting over the top of the ball screen in drop coverage, attacking the screener’s inside shoulder before using it makes getting over the screen that much tougher and creates a bigger advantage for the ball handler.
3. Attack
Turn the Corner
If the drop defender steps up to take away a pull up jumper or gets caught in the middle between the ball handler and screener rolling to the rim, the ball handler should be able to attack his outside shoulder and get downhill.
Hostage Dribble
Another great option for the ball handler as he comes off the ball screen is a hostage dribble or dribble hold. Since his defender is trailing over the top of the ball screen, the ball handler can decelerate to keep the defender on his backside. This creates a 2v1 numbers advantage against the drop defender and allows the ball handler to work to open space for a potential shot.
Snake
The final option attacking option for the ball handler is the “snake dribble.” As the ball handler comes off the ball screen, he can tight curl or snake to the opposite side, while the big rolls opposite. After snake dribbling, the ball handler’s first option is to turn the corner and get downhill. If he cannot get downhill to the rim, he can snake to open space for a pull up jumper or floater.
4. Hit the Roll
Pocket Pass
Another option if the drop defender steps up as the ball handler comes off the screen is a pocket pass to the screener rolling to the rim. The on-ball defender is trailing over the top of the ball screen, so if the big is able to get into his roll as soon as possible it creates a 2v1 numbers advantage and forces the drop defender to make a decision—take the ball or stay with the screener rolling to the rim.
Lob
If the screener gets behind the drop defender as he rolls, it should be an automatic lob pass. Now while it would be great if it was for a dunk, the more realistic pass is thrown towards bottom corner of the back board and letting the screener go up and get it to finish.
Pick & Pop
If the screener is an outside threat, picking and popping is a great option against drop coverage. As the ball handler comes off the screen, he is occupying two defenders—the screener’s defender is dropped in the lane taking away the drive and his defender is trailing over the top. This allows the screener to easily pop to open space along the perimeter
5. Punish the Help
The final option against drop coverage, and against any ball screen coverage, is to punish the help. More often than not, teams will use a third defender to help defend the ball screen action by tagging the roller—leaving his man open.
If the roller is tagged or the ball handler can draw an additional help defender, the ball handler should look to punish the help by kicking to the open shooter along the perimeter.