
BALL SCREEN OFFENSE—Keys to an Effective Drag Screen
What is a drag screen?
Drag screens are one of the most popular and effective secondary actions teams flow into if there are no initial scoring options from the primary break. To put it simply, a drag screen is a ball screen set immediately after the initial transition break with the goal being to put immediate pressure on the defense. You’'ll see teams flow into some type of drag screen whenever their 5 man or post player is trailing in transition.
In addition to producing early high percentage scoring opportunities, drag screens are popular because the action itself is extremely simple and easy to implement. With that said, in this breakdown we will take a more detailed look at what goes into an effective drag screen.
Pace:
The biggest key to creating an advantage with a drag screen is pace. You must get into the drag screen quickly while the defense is still transitioning from their transition defense to their set half court defense. Typically, the other team’s post player will be sprinting back to the paint in transition defense. Getting into the drag screen quickly will often times leave him out of position meaning the other team cannot execute their ball screen coverage.
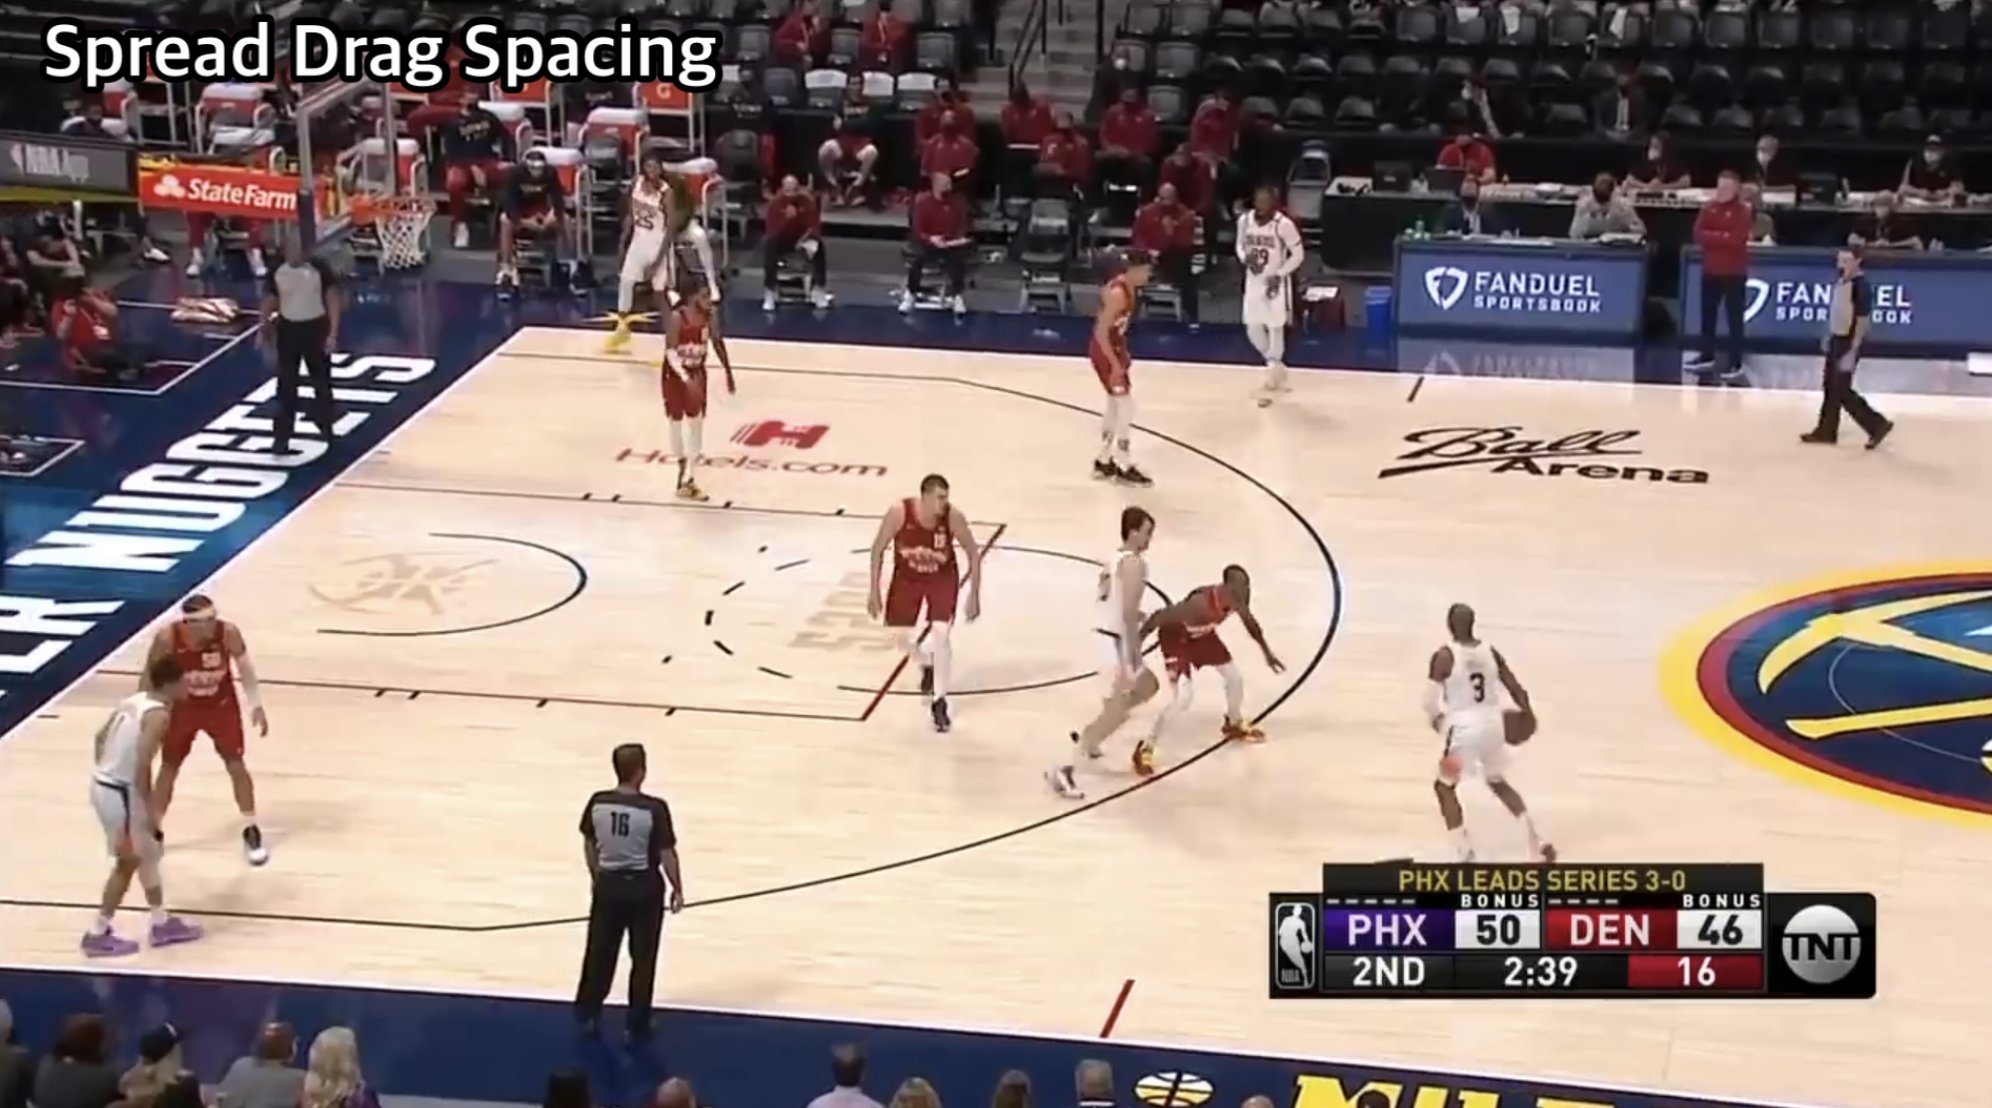
Spacing:
While you can flow into many different types of drag screens (DHO + drag, empty drag, double drag), in this breakdown we are going to breakdown the “spread drag.” The spread drag, which is perhaps the common type of drag screen teams flow into, simply refers to having spread ball screen spacing as the drag is set. Two players spaced along the weak side, with the third player not in the drag screen action occupying the strong side corner.
Setting and Using the Drag:
Like I previously mentioned, teams will typically flow into a drag screen whenever the 5 man is trailing the ball in transition (5 rebounds, inbounds, etc.). When preparing to set a drag screen, it’s important the trailing 5 man communicate “Drag, drag, drag” to let the ball handler know he has a ball screen coming.
You want to set the drag screen just inside of the three point line. Setting the screen here allows your ball handler, if a shooter, to pull the trigger if his defender chooses to go under the screen. You also want to set the drag screen at an angle that forces the on-ball defender over the screen. By forcing the on-ball defender over the ball screen, so he is ideally trailing the ball handler, you create a 5v4 numbers advantage.
If the on-ball defender does go under the screen, this triggers an automatic “twist” or re-screen from most teams. Twisting or re-setting the ball screen on the opposite sides does two things that will more than likely force the on-ball defender to go over the re-screen—it is set lower or closer to the rim making a pull up jumper that much easier, and it changes the angle making it hard for the defender to go under a second time.
After setting the drag screen, the screener will roll hard to the rim. Rolling hard makes the drag screen that much more effective, even if the screener doesn’t receive the pass on his roll. Rolling hard “breaks the defense” meaning it collapses the off ball defenders, and opens up kick out threes.
Shake Out of the Corner:
Another key aspect of the drag screen is the player in the strong side corner. As the ball handler is attacking middle off of the drag screen, the player in the strong side corner should “shake” or lift to the wing.
Lifting to the wing creates space for the screener as he rolls to the rim, but more importantly it forces his defender to make a decision—Do I help on the roll or do I stay with my check?
The defender guarding the player in strong side corner will typically be tasked with “tagging” or helping on the screener rolling to the rim. If he tags the roll, he risks living his man open as he lifts to the wing. If he stays with his check as he lifts to the wing, he risks leaving the screener open as he rolls.
If the ball handler kick the ball back to the player lifting to the wing, the screener should immediately turn and seal, looking to receive a deep post entry. When the player lifting the wing receives the pass, he should first look to pull the trigger if a solid shooter. If not, he can rip and drive baseline (screener is sealing his man) or enter the ball to the screener who has deep post position.
Weak Side Players:
As the drag screen occurs, the two players spaced along the weak side have a few options:
Flare
The player in the weak side corner (3) can set a flare screen for the weak side wing (4) to drift to the corner for a potential kick out three. A weak side flare is also a great way to occupy nail help should the defense pack the middle to defend against the flip + drag action.
Pin Down
Similar to the flare screen, a weak side wing (4) to corner (3) pin down can create an open kick out three, or at the very least occupy the weak side help defenders.
Keep Space
If both weak side players are consistent outside shooters, they can simply stay put agains the sideline and keep space. Hands and feet ready to shoot on the catch.
Exchange
Simply having the weak side wing and corner players exchange is also another popular way teams try and occupy help defenders when running this action.
To learn more about weak side options to occupy help defenders during a ball screen, check out the Ball Screen Offense—Occupying the Help breakdown.
Making the Reads:
The ball handler’s first option is always to reject the drag screen and attack opposite. Since the defense is more than likely positioned in their ball screen coverage, rejecting and attacking opposite will leave them out of position.
If the ball handler cannot reject the screen and is forced to use it, he should first look to find space for a pull up jumper (ideally a three) if a shooter. If the ball handler is not a shooter or cannot get to space to shoot, he can look to get downhill and attack the rim.
If the ball handler cannot score because he draws the screener’s defender, he can look to hit the screener as he is rolling to the rim. If the defender in the strong side corner tags or helps on the roll, the ball handler can kick it back to the player lifting to the wing for a shot, drive or post entry.
The final option for the ball handler is to kick it to a player on the weak side for a shot or drive. If the weak side defenders load up to the nail and pack the middle, a quick kick can lead to an open three or the extra pass being made.